• Cinnamon Rolls with Frosting

    DSC_0263

    When I make cinnamon rolls, I usually make my grandmother’s recipe, which is more like a sticky bun/cinnamon roll.  This weekend I tried a new recipe…one with frosting.  It was a hit.  Everyone loved the frosting!  How could you not love a cinnamon roll with frosting?!?!?!

    I lightened the recipe up by using Country Crock Light spread in place of the butter for both the cinnamon rolls and frosting, and it worked very well.

    Recipe adapted from Temp-Tations.

    Ingredients:

    Dough:

    • 2 large eggs
    • 1 (1/4-oz.) packet active dry yeast
    • 1 cup milk, heated until warm
    • 5 TBSP butter or Country Crock Light, melted
    • 3 1/2 c. all-purpose flour
    • 1/2 c. Bisquick baking mix
    • 1/2 c. sugar
    • 3/4 tsp. salt

    Filling:

    • 5 TBSP butter or Country Crock Light, softened
    • 1 c. dark brown sugar
    • 1 TBSP ground cinnamon

    Frosting:

    • 3 TBSP butter or Country Crock Light, softened
    • 1 c. powdered sugar

    Directions:

    1. In a large mixing bowl, whisk eggs until frothy. Whisk in yeast, milk, and melted butter and let sit for 10 minutes.
    2. Add the remaining Dough ingredients to the mixing bowl, and mix into a sticky dough. Transfer to a well-floured surface and knead, adding additional flour, just until no longer sticky. Return ball of dough to the mixing bowl, cover, and put in a warm place to rise for 1 hour.
    3. On a well-floured surface, use a rolling pin to roll out dough, until it is a large, 1/4-inch thick rectangle. Spread the softened butter on the surface of the dough to start the filling. Combine brown sugar and cinnamon, and sprinkle evenly over the buttered dough.  Roll the rolling pin over the brown sugar and cinnamon to press all of the filling into the dough (and it makes it easier to roll).
    4. Line two jelly roll sheets with parchment paper and spray the parchment paper with nonstick cooking spray.
    5. Grab the short side of the dough, and roll entire length of dough into a pinwheel, pressing firmly as you go. Slice rolled pinwheel into 1 1/4 inch thick rounds and evenly spread about 9 (3 rows of 3) onto the jelly roll sheet.  You may need to pinch the ends so the roll doesn’t unroll.  One sheet may have fewer rolls, but that’s ok. Cover and let rise in a warm place for another 30 minutes.
    6. Preheat oven to 400* and bake cinnamon rolls 18-22 minutes, or until the tops are golden brown.
    7. Combine melted butter and powdered sugar to create the frosting. If frosting is hard, microwave 10-15 seconds to soften. Spoon frosting over cinnamon rolls while still hot, and serve.
    8. The next day, microwave your rolls for 15-30 seconds, and it tastes like it’s right out of the oven.

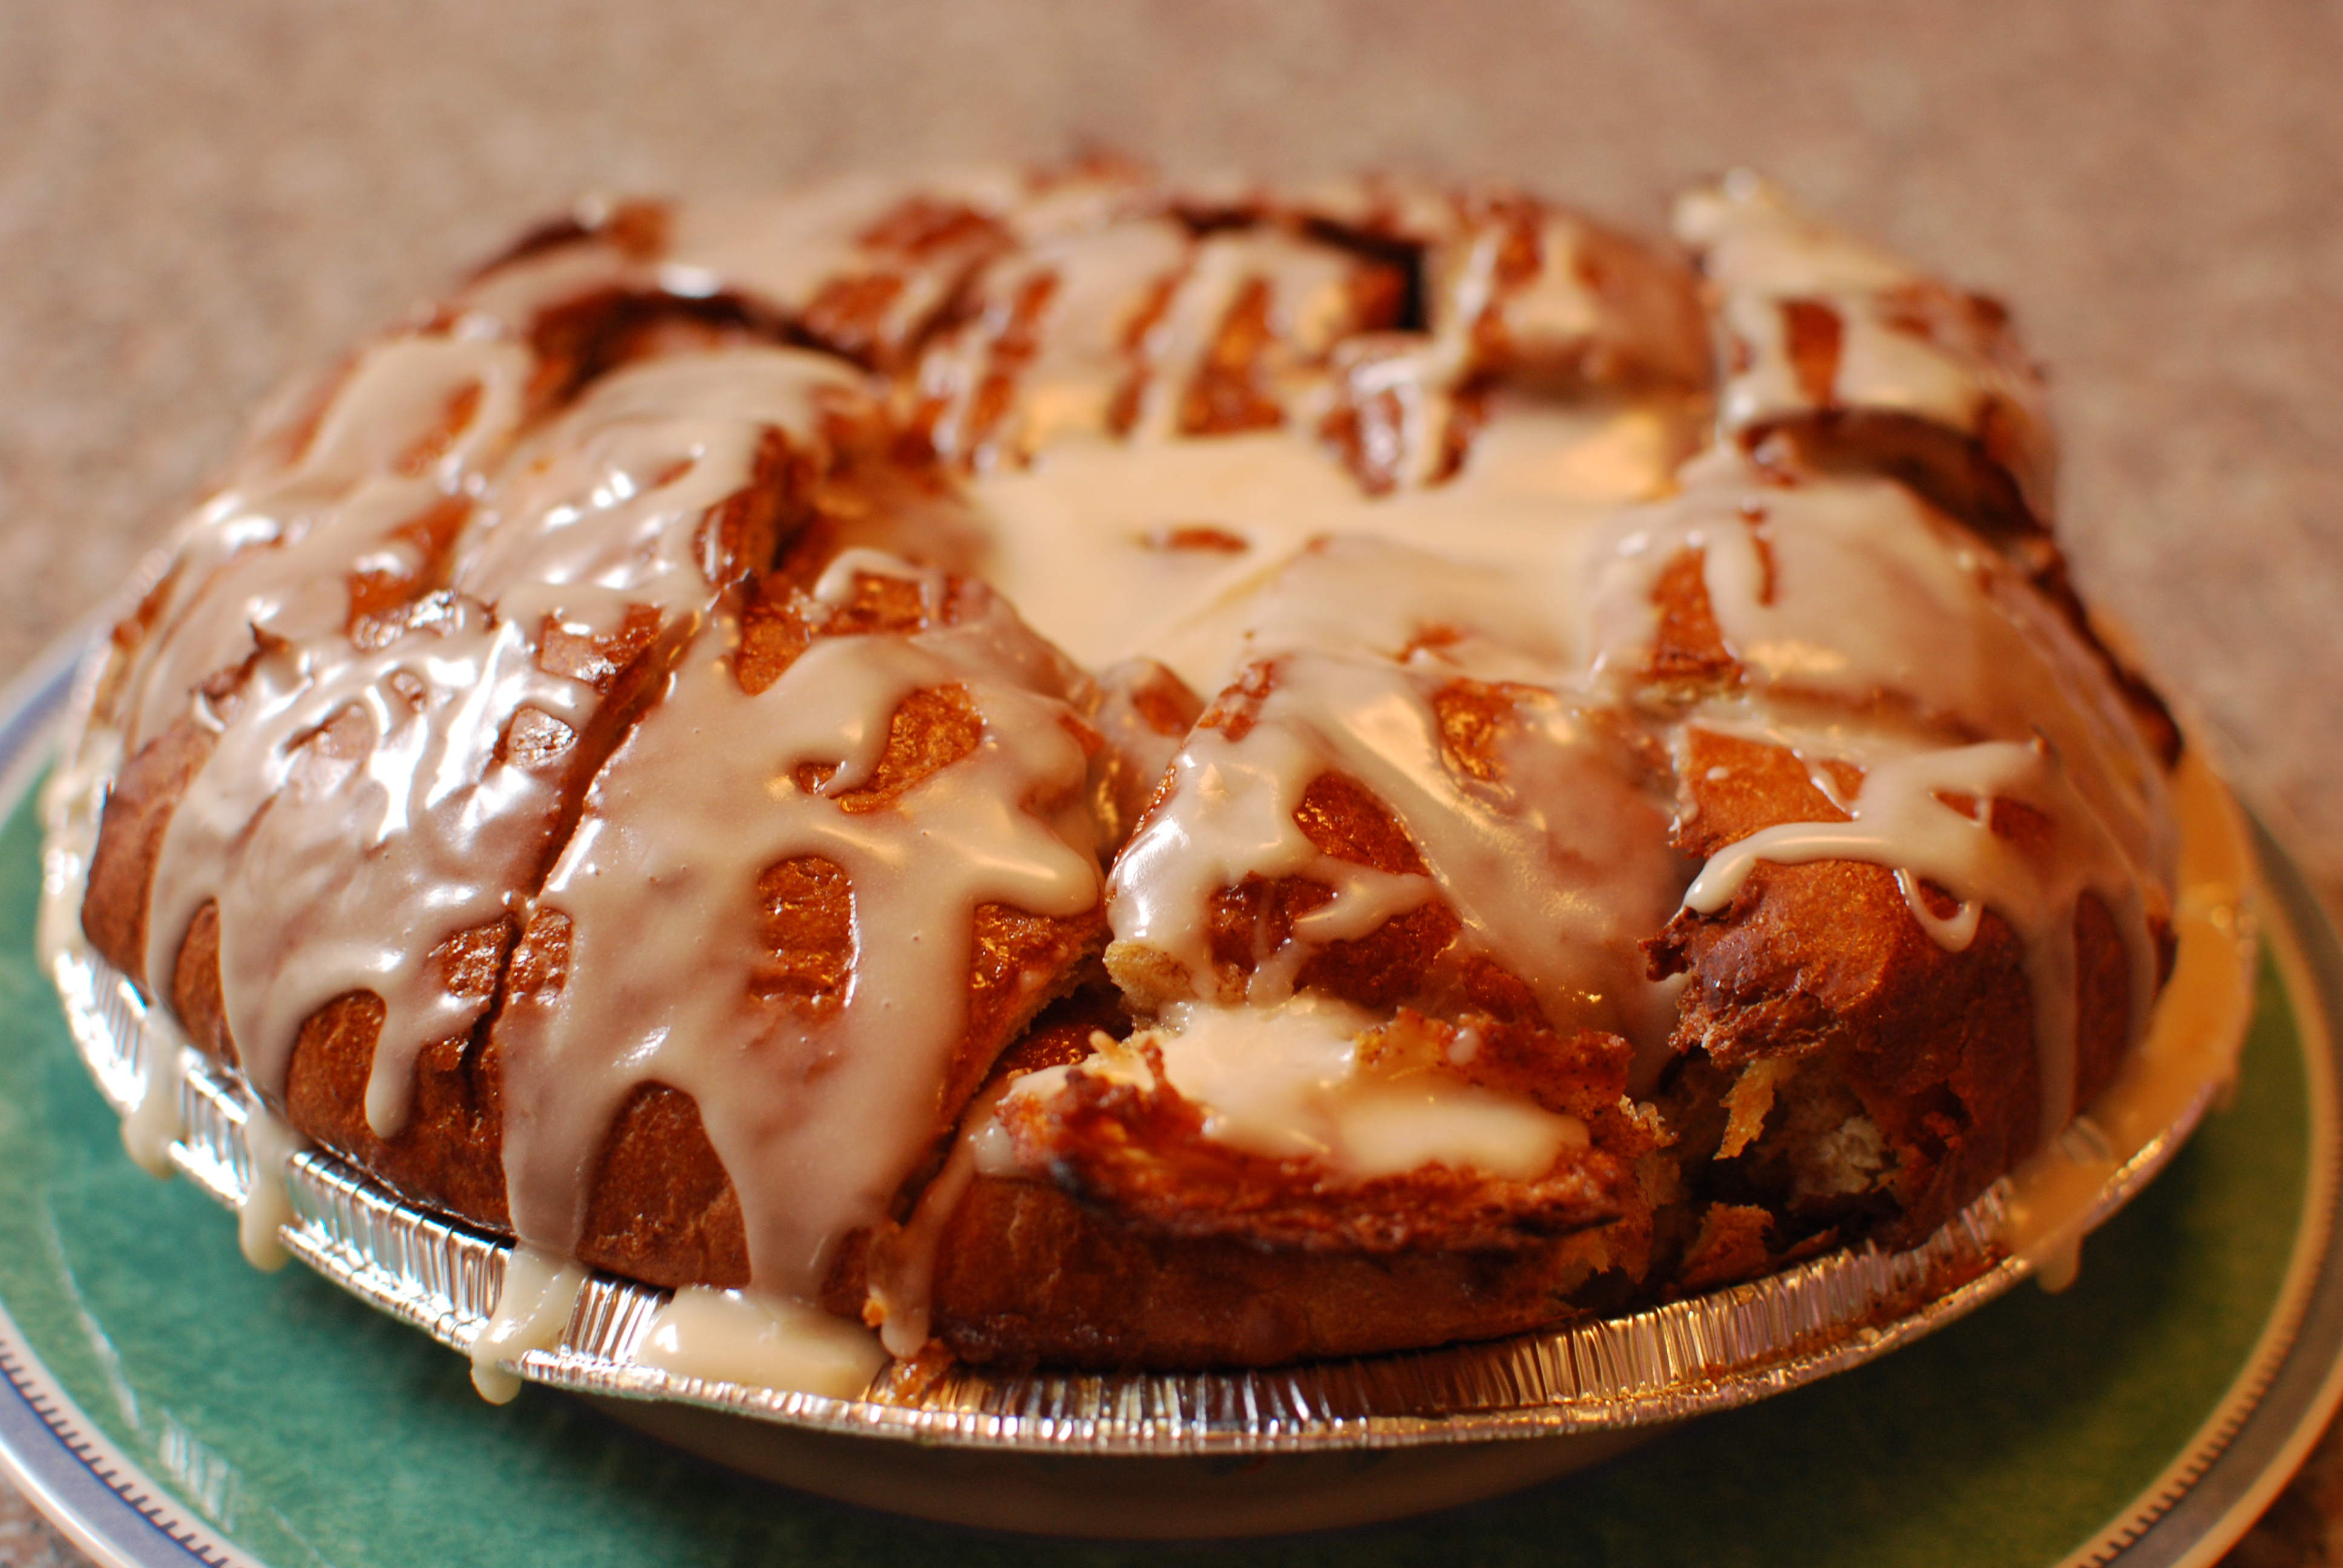
    Cinnamon Rolls with Frosting:
    5star

  • Whole Wheat Banana Muffins with Maple Frosting

    DSC_0132

    These muffins are beyond delicious.  They are moist and flavorful and you would never know that they are healthyish!

    Think banana bread meets maple frosting.

    Think muffin meets cupcake.

    Think delicious.

    I combined two different recipes to create these muffins.

    Muffin recipe from Two Peas and Their Pod.  Frosting Recipe from Crazy for Crust.

    Ingredients:

    • 2 c. whole-wheat flour
    • 1 tsp. baking powder
    • 1 tsp. baking soda
    • 1/2 tsp. salt
    • 1/4 tsp. ground cinnamon
    • 4 large ripe bananas (about 1 3/4 c. mashed)
    • 1 c. packed brown sugar
    • 1/4 c. coconut oil, melted and cooled
    • 1 large egg
    • 1/2 c. plain Greek yogurt
    • 2 tsp. pure vanilla extract
    • Turbinado sugar, for sprinkling on muffins before baking, optional

    Frosting Ingredients:

    • 3 TBSP unsalted butter, melted
    • 1 c. powdered sugar
    • 1/2 tsp. maple extract
    • 1 tsp. vanilla extract
    • Milk or heavy whipping cream

    Directions:

    1. Preheat the oven to 350*F. Line a muffin pan with paper liners, spray with cooking spray, and set aside.
    2. In a medium bowl, whisk together flour, baking powder, baking soda, salt, and cinnamon. Set aside.
    3. Peel the bananas and mash with a fork. Place the mashed bananas in a large bowl. Add the brown sugar, coconut oil, egg, Greek yogurt, and vanilla extract. Stir until well combined. Slowly stir in the dry ingredients. Mix until just combined.
    4. Fill muffin liners three-quarters full. Bake until toothpick inserted into center comes out clean, about 20 minutes. Transfer to wire rack to cool.
    5. For the frosting: whisk melted butter and powdered sugar. Add extracts, whisk until smooth. Add milk or heavy whipping cream (to desired consistency…start with just a small amount (1-2 tsp.) at a time and add more, if necessary), whisk until smooth. Immediately frost completely cooled muffins.

    Whole Wheat Banana Muffins with Maple Frosting:
    5star

  • Apple Zucchini Muffins

    DSC_0063

    These muffins are healthy, delicious, and kid approved. Need I say more?  I admit I was a bit skeptical given how little fat is in the muffins, but they turned out extremely moist and flavorful.

    They freeze wonderfully.  After they cool, I simply put them in a freezer bag, and then each night I pull 2 out (one for each kiddo), and put them in a sandwich bag for their school lunch the next day.  Perfect!

    Recipe adapted from Two Peas and their Pod.

    Ingredients:

    • 2 1/4 c. whole wheat flour
    • 3/4 c. dark brown sugar
    • 1/2 tsp. baking soda
    • 1/2 tsp. baking powder
    • 1/2 tsp. salt
    • 1 tsp. ground cinnamon
    • 1/4 tsp. ground allspice
    • 1 c. buttermilk
    • 1/4 c. unsweetened applesauce
    • 1 TBSP oil (melted coconut oil, canola oil, or vegetable oil)
    • 1 large egg
    • 1 tsp. vanilla extract
    • 1/2 c. grated apple (approximately 2 Granny Smiths)
    • 1/2 c. grated zucchini, moisture slightly squeezed out
    • 1 c. chopped peeled apple (approximately 1 Granny Smith)

    For the Topping: use more if needed

    • 4 TBSP crunchy sugar
    • 1/2 tsp. cinnamon

    Directions:

    1.  Preheat oven to 375*F. Line a muffin pan with paper liners or spray with cooking spray. Set aside.
    2. In a large bowl, whisk together flour, brown sugar, baking soda, baking powder, salt, cinnamon, and all-spice. In a small bowl, whisk together buttermilk, applesauce, oil, egg, and vanilla extract. Pour the wet ingredients over the dry ingredients and mix with a wooden spoon or spatula until just combined. Do not over mix. Gently stir in the grated apple, zucchini, and chopped apples.
    3. To make the topping, combine turbinado sugar and cinnamon in a small bowl. Stir well.
    4. Fill the prepared muffin pan with muffin batter, filling each cup about 3/4 the way full. Sprinkle each muffin with cinnamon sugar topping. Bake for 20 minutes, or until muffins are golden and a toothpick inserted in the center of a muffin comes out clean. Let muffins cool to room temperature and serve.

    ***Note-these muffins freeze well

    Apple Zucchini Muffins:
    5star

  • Cinnamon Pull-Apart Rolls

    DSC_0742

    These pull-apart rolls are so easy and so delicious.  I’ve made it a number of times, both with the large round loaf (as pictured) and with individual rolls.  Both equally delicious, but we tend to prefer the individual rolls, because there is more surface area for that crispy, yet sweet gooey goodness!

    ***Note: if you use individual rolls, you’ll need a muffin pan, and the directions differ slightly, but I’ve noted the changes below.

    Recipe adapted from The Country Cook.

    Ingredients:

    • 1 Hawaiian round sweet bread loaf (or 12 individual rolls)
    • 1 c. brown sugar
    • 6 TBSP butter
    • 1 tsp. cinnamon
    • 3 tsp. honey

    Frosting:

    • 1 c. powdered sugar
    • 1-2 TBSP milk
    • 1 tsp. vanilla extract (or our personal favorite orange extract)

    Directions:

    1. Preheat oven to 400F degrees.
    2. Remove loaf of sweet bread from aluminum pan.
    3. Using a serrated knife, make 5 vertical slices in loaf about 1 1/2 inches apart stopping about 1/2-inch from bottom crust.  ***Note: If using individual rolls make 2 slices about 1 inch apart stopping about 1/2-inch from bottom crust.
    4. In a small saucepan over medium/low heat, combine brown sugar, butter and honey. Stir constantly until everything is melted and combined (about 5 minutes.) Remove from heat then stir in cinnamon.
    5. Open each slice that you made in the bread and spread on a couple of tablespoons of the glaze. Press the slices together to make sure glaze gets distributed on each side of the slices.
    6. Then take your knife and make 4 more horizontal slices. Then fill in those slices with glaze. ***Note: If using individual rolls make 2 slices about 1 inch apart stopping about 1/2-inch from bottom crust.
    7. Spray pan with nonstick cooking spray, push loaf back together and put it back into the aluminum pan.  ***Note: If using individual rolls, spray a muffin pan with cooking spray and put 1 roll in each muffin slot.
    8. Spread any remaining glaze over the bread and bake for about 8-10 minutes.
    9. While bread is in the oven, start making the glaze. Whisk together powdered sugar, milk and vanilla extract (or orange, or whatever flavor you like).
    10. Once bread is finished baking, you can remove it from the pan or serve it directly from the pan (be careful, it’s hot!) Spoon the glaze on the warm bread.

    Cinnamon Pull-Apart Rolls:
    5star

  • Mini Orange Monkey Rolls

    DSC_0941

    I introduced Ellie to orange rolls this week when we had a mother daughter lunch day, and just like me she is hooked.  Orange rolls are like cinnamon rolls, but instead of the cinnamon there is the delicious sweet orange flavor.

    When I came across this recipe I just knew it would be delicious and it was.  They were inhaled.

    Recipe from The Recipe Critic.

    Ingredients:

    Mini Orange Monkey Rolls:

    • 12 frozen yeast dinner rolls (not the bake and serve in 5-10 minutes kind)
    • 1 c. sugar
    • zest of one orange
    • 1/2 c. butter
    • 1/2 tsp. (I actually used 1 tsp.) Karo syrup
    Sweet Orange Glaze (can omit, if desired):
    • 1 c. powdered sugar
    • zest of one orange
    • 1 TBSP butter, melted
    • 2 TBSP orange juice
    • 1 tsp. vanilla

    Directions:

    1. Take out 12 frozen dinner rolls and allow them to thaw but still be cold. Cut each roll with a pizza cutter into about 4-6 smaller pieces each.
    2. Mix the 1 c. of sugar and orange zest into a small bowl and set aside.
    3. Preheat oven to 350*.
    4. Melt the 1/2 c. butter and mix with karo syrup.
    5. Spray a muffin pan with cooking spray and set aside.
    6. Dip each small piece of the butter and roll in the sugar/orange zest mixture.  (There will be quite a bit of butter and some sugar/orange zest mixture left over.) Put about 4-6 pieces into the muffin tin and fill them about 1/2 way with the small frozen dinner roll pieces.  Let them double in size, about a couple of hours.
    7. Bake for 15 minutes or until golden brown.
    8. Let the rolls cool slightly and then use a knife to loosen them up. Remove each roll and place them upside down on a cooling rack as the bottoms will be sticky.
    9. When ready to serve, make the sweet orange glaze: mix the powdered sugar, orange zest, 1 TBSP butter, 2 TBSP orange juice, and 1 tsp. vanilla together.  Drizzle over the tops of each of the orange rolls. (If you don’t want the glaze you can omit).
    Mini Orange Monkey Rolls:
    5star
  • Almond Joy Granola

    DSC_0933

    Steve eats granola on his yogurt every morning for breakfast.  I usually just buy granola (because really, why bother making your own?), but then I came across this recipe and I knew I had to try it out.

    I am a convert and will now be making homemade granola!

    If you like Almond Joys, you will love this granola!!!  It is so good, and surprisingly easy to make.

    Recipe adapted from A Spicy Perspective.

    Ingredients:

    • 2 c. rolled oats
    • 1 ½ c. sliced almonds
    • 1/3 c. unsweetened cocoa powder
    • ¼ c. brown sugar
    • ¾ tsp. ground cinnamon
    • ½ tsp. salt
    • 1/3 c. honey + additional to drizzle
    • 1 tsp. vanilla extract
    • 1 ¼ c. (more or less to your liking) large unsweetened (you can use sweetened if you want) coconut flakes
    • ¾ c. mini chocolate chips

    Directions:

    1. Preheat the oven to 350 degrees F. Mix the oats, almonds, cocoa powder, brown sugar, cinnamon, salt, honey, vanilla, and sweetened coconut in a bowl.  Line a 9×13 jelly roll pan with parchment paper.
    2. Spread the granola out into a thin even layer. Bake for 10 minutes. Mix with a spatula, drizzle additional honey; then spread the granola out again and bake another 10 minutes. (If you don’t mix the sweetened coconut in step 1; then sprinkle the coconut over the top of the granola and bake another 3-5 minutes to toast (if you use sweetened coconut and didn’t mix in step 1 it will take longer to toast). Watch the coconut – it burns very quickly!
    3. Once the coconut is toasted, remove the granola from the oven and mix. Cool completely; then mix in the mini chocolate chips. Store in an airtight container until ready to serve.

    Almond Joy Granola:

    5star

  • Quick Corned Beef Hash

    corned-beef-hash.jpg

    The country club in the town where I grew up served an awesome brunch.  Every time I went there I would get corned beef hash.  The corned beef hash was not that minced mush looking stuff you get at some restaurants or out of a can.  They used big roasted potatoes, fresh corned beef, and eggs over easy.  The first time I had it I was hooked!

    A few nights ago we made a corned beef (you know, the kind that comes in the meat case with the seasoning packet).  Surprisingly both kiddos loved it!  We will certainly be making that again. When I was thinking about how to use the leftovers, corned beef hash came to mind, so we had brunch for dinner.

    One word: delicious!

    Ingredients:

    • Tator tots, cooked according to package
    • Leftover corned beef, reheated
    • eggs, over easy

    Directions:

    1. Cook tator tots, reheat corned beef, cook eggs over easy.
    2. On a plate put tator tots, top with corned beef, top with eggs over easy.

    Quick Corned Beef Hash:

    5star.jpg

  • Blue Cornmeal Pancakes

    blue-cornmeal-pancakes.jpg

    We have the great luxury of living near the War Eagle Mill. They have a fabulous selection of organic whole grains. This past weekend we took the kids there to see the operating water powered grist mill, which they were fascinated by. We bought a whole bunch of the grains. We are also super lucky that since it’s local, even Walmart carries much of their grains, but the Mill has a huge selection.

    We bought some blue cornmeal , and right on the sack of cornmeal is a recipe for Blue Cornmeal Pancakes, and they were delicious!

    Ingredients:

    • 1 c. blue cornmeal
    • 1/2 c. flour or whole wheat flour
    • 1 1/2 tsp. baking powder
    • 1 TBSP sugar
    • 1 1/4 c. milk
    • 1 egg, lightly beaten
    • 1 TBSP vegetable oil
    • 1 + tsp. vegetable oil
    • Butter and Syrup

    Directions:

    1. In a medium size bowl, mix dry ingredients together; stir in egg, 1 TBSP oil, and milk.
    2. Preheat griddle on medium heat, coat with 1 tsp. oil. Pour out batter by 1/4 cupfuls to make a small griddle cake. Flip when edges are dry and cakes are bubbly.
    3. Serve with butter and syrup.

    Blue Cornmeal Pancakes:

    4star.jpg

  • Challah: Take 2

    challah.jpg

    Yes, I’ve made challah before, and now I’ve finally come to a recipe and process that is to all of our liking.  This recipe yields 2 loaves…use one and freeze the other for next week!

    Ingredients:

    • 1 c. lukewarm water
    • 3 envelopes yeast (totaling 2 TBSP + 3/4 tsp. yeast) (I like the Rapid Rise yeast)
    • 3/4 c. sugar
    • 1 1/4 c. lukewarm water
    • 3/4 c. vegetable oil
    • 1 TBSP salt
    • 3 large eggs
    • 8-10 c. bread flour
    • 1 egg for egg wash

    Directions:

    1. In a small bowl or measuring cup, mix the yeast in 1 c. water. Make sure the water is warm–not cold or hot. This allows the yeast to work properly–you’ll know it’s working of you see little bubbles on the surface. (If no bubbles, don’t worry, just continue.) Set aside.
    2. Combine sugar, 1 1/4 c. water, oil, and salt in a large bowl. In a separate bowl, beat 3 eggs. Then add the eggs to the sugar mixture.
    3. Add the yeast to the sugar mixture.
    4. Add 4 or 5 cups of flour and mix well. Gradually add 4 or 5 more cups of flour. By the time you add 6 to 7 cups of flour, it’s easier to mix the remaining flour into the dough if you put the dough on a floured surface. By judging the feel you will know how much more to add–if the mixture is sticky, add more flour; if it’s dry and stringy, add a little water. (The amount of flour you’ll need will vary every time, depending on things like the air temperature and humidity, so don’t worry about an exact amount of flour.)
    5. Knead your dough on a floured surface for 7 to 10 minutes…I only lasted 7 minutes. Add more flour to your surface as needed.
    6. Put some vegetable oil on a paper towel and wipe it around the inside of a large clean bowl. Put the dough in the oiled bowl, and flip the dough over so both sides get a little bit of oil on them. Then lay a piece of wax paper over the bowl and then place a dish towel on top of that. Let the dough rise for an hour, and it should double in size. (If your dough doesn’t rise much don’t worry, and continue on–trust me.)
    7. Punch down the dough to deflate it, and knead again for a few minutes to work out any excess air bubbles. Put the dough back into the bowl, and cover with wax paper and towel, and let rise for another half hour.
    8. Now you’re ready to braid. Take the dough out of the bowl and divide it into 2; working with one half at a time, divide the half into 4 equal chunks.  Roll the four pieces into snakes about 12 to 16 inches long. The length doesn’t matter, just make sure all 4 are the same length. I have found that if your snakes are too thick, the challah will be too thick and it won’t cook in the center, so it’s better to have longer thinner snakes than shorter fatter ones.
    9. Lay the 4 snakes on your work surface and pinch the ends together. Take the piece on the left and weave it over the roll of dough next to it, then under the next roll, and finally over the last roll, so that it finishes on the far right. Next take the piece that is now on the far left, and again, weave over, under, and over until it finishes on the far right. Continue to weave the left-hand piece until the pieces are too short to weave. Then pinch the ends together and tuck them under the loaf. Repeat with the second half.
    10. Step by step:

    1.jpg

    Step 1: 4 equal snakes

    2.jpg

    Step 2: Pinch ends together

    3.jpg

    Step 3: Take far left snake and weave over, under then over the snakes to the right

    4.jpg

    Step 4: Take the new far left snake and weave over, under and over the snakes to the right. Repeat.

    5.jpg

    Step 5: Finished braided Challah and pinch the other ends together and tuck under the loaf

    10. Place parchment paper on each cookie sheet and put one loaf on each cookie sheet and place a dishtowel over the loaves and let rest for 10 minutes.

    11. Prepare egg wash–don’t dilute it with water! Brush the egg wash onto each loaf.

    12. Bake at 350 for 45 minutes. Mine was done at 40 minutes, so I’d start checking at 35.

    Challah:

    5star.jpg

  • Hashbrowns: Smothered and Peppered

    smothered-and-peppered.jpg

    We love our hashbrowns smothered (with onions) and peppered (with jalapenos).  Last night we had breakfast for dinner, and I made my smothered and peppered hashbrowns, and they were delicious!

    Ingredients:

    • Olive oil
    • 1 onion, sliced thinly
    • 1/4 c. sliced pickled jalapenos (you can chop them up if you like)
    • Frozen hashbrown potatoes (the kind that have not been fried or cooked yet–just frozen potato shreds)
    • Salt and pepper to taste

    Directions:

    1. In a nonstick skillet, heat some olive oil over medium-high heat. Add the onions, and stir them occasionally, but let them caramelize. Once the onions are caramelized, add the jalapenos and cook a few minutes longer.
    2. In another nonstick skillet, heat some olive oil over medium-high heat. Add the frozen potatoes. Add salt and pepper. Don’t fiddle with the potatoes. Let them set and get crispy golden on the bottom side. Once crispy and golden, flip the potatoes to cook the other side, and add some salt and pepper. This process can take 15-20 minutes. Just be patient, it’s worth it.
    3. To serve: put hashbrowns on your plate and top with the onion jalapeno mixture.

    Smothered and Peppered Hashbrowns:

    5star.jpg