• BeanTamale Pie

    tamale-pie.jpg

    Tonight’s dinner is my adaptation from a recipe I found on Small Time Cooks. I call it Tamale Pie, because that’s what it reminds me of. It was delicious, and so easy to make. Next time I make it though, I’m going to pan fry the polenta first to get it a bit crisp, which I think will add nice texture to the dish.

    Ingredients:

    • 1 TBSP olive oil
    • 2 bunches scallions, white and green parts separated and thinly sliced
    • 2 tsp. chili powder
    • 1 tsp. cumin
    • pinch of salt
    • few grinds of pepper
    • 2 15 oz. can pinto beans, drained and rinsed
    • 2 15 oz. can black beans, drained and rinsed
    • 1 14.5 oz. can diced tomatoes in juice
    • 1/2 c. water
    • Cooking spray
    • 1 16 oz. tube prepared polenta, patted dry (I used about 3/4 of the tube)
    • 1 c. fresh cilantro leaves, roughly chopped, plus more for garnish
    • 2 tsp. chipotle Tobasco sauce
    • 2 c. coarsely shredded Pepper Jack cheese
    • Salsa
    • Sour Cream

    Directions:

    1. Preheat oven to 400 degrees.
    2. In a large saucepan, heat oil over medium; then add the white part of the green onions, chili powder, cumin and season with salt and pepper. Cook until softened, about 2 minutes. Add beans, tomatoes with juice, and 1/2 cup water. As you bring to a boil, mash 1/4 of the beans with the back of a spoon against side of pan to release starch. Reduce to a simmer; cook until mixture has thickened and most of the liquid is gone, about 10 to 15 minutes.
    3. Spray your baking pan (I used a 9×16 pan, but you can use whatever size you want) with cooking spray. Slice the polenta into 1/4 thick rounds. You can either pan fry them in a nonstick skillet or just lay the slices on the bottom of your pan. Be sure the polenta slices are tightly arranged.
    4. Remove bean mixture from heat. Stir in green part of the green onion, cilantro, and Tabasco. Spoon bean mixture over polenta; top with cheese. Bake at 400 degrees, 15 to 20 minutes. Let stand 10 minutes before serving. If desired garnish with cilantro, and serve with salsa and sour cream.
    5. To freeze- Let unbaked pies cool completely; cover with aluminum foil. Freeze up to 3 months. Bake frozen with foil on at 400 degrees until warm in center, 60-70 minutes for ramekins, 70-80 minutes for pie plates. Remove foil; bake until cheese is golden brown, about 15 minutes.

    Tamale Pie:

    4star.jpg

  • Pear Crisp with Oat Streusel Topping

    pear-crisp.jpg

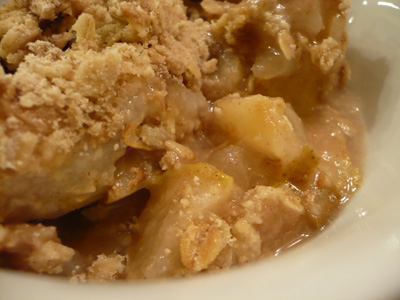
    This recipe is adapted from a recipe in the Cooking Light, October 2007 issue. It was really good. The original recipe calls for leaving the skin on the pears (for extra fiber), which I did, but neither -s nor myself cared for the flavor or texture of the cooked pear skin. Next time I’ll remove the skin.

    Ingredients:

    Crisp:

    • 7 3/4 cups Bartlett or Anjou pears, pealed and cubed
    • 1 tablespoon all-purpose flour
    • 1 tablespoon fresh lemon juice
    • 1/2 teaspoon ground cinnamon
    • 1/4 teaspoon salt
    • Cooking spray

    Topping:

    • 1/2 cup all-purpose flour
    • 1 cup regular oats
    • 1/4 cup packed brown sugar
    • 1/8 teaspoon ground cinnamon
    • Dash of salt
    • 1/4 cup chilled butter, cut into small pieces
    • Whipped cream

    Directions:

    1. Preheat oven to 375°
    2. To prepare crisp, combine the first 5 ingredients in a large bowl; toss to combine. Spoon mixture into an 11 x 7-inch baking dish coated with cooking spray.
    3. To prepare topping, lightly spoon flour into a dry measuring cup; level with a knife. Combine flour, oats, sugar, 1/8 teaspoon cinnamon, and dash of salt in a small bowl; stir to combine. Cut in butter with a pastry blender or 2 knives until mixture resembles very coarse meal. Sprinkle oat mixture evenly over pear mixture. Bake at 375° for 50 minutes or until browned on top. Serve with whipped cream.

    Pear Crisp with Oat Streusel Topping:

    4star.jpg

  • Hashbrowns: Smothered and Peppered

    smothered-and-peppered.jpg

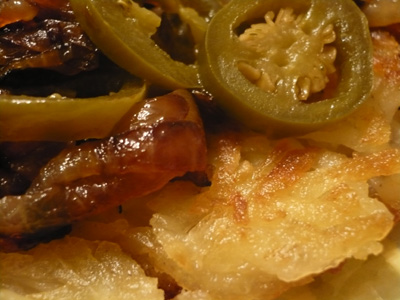
    We love our hashbrowns smothered (with onions) and peppered (with jalapenos).  Last night we had breakfast for dinner, and I made my smothered and peppered hashbrowns, and they were delicious!

    Ingredients:

    • Olive oil
    • 1 onion, sliced thinly
    • 1/4 c. sliced pickled jalapenos (you can chop them up if you like)
    • Frozen hashbrown potatoes (the kind that have not been fried or cooked yet–just frozen potato shreds)
    • Salt and pepper to taste

    Directions:

    1. In a nonstick skillet, heat some olive oil over medium-high heat. Add the onions, and stir them occasionally, but let them caramelize. Once the onions are caramelized, add the jalapenos and cook a few minutes longer.
    2. In another nonstick skillet, heat some olive oil over medium-high heat. Add the frozen potatoes. Add salt and pepper. Don’t fiddle with the potatoes. Let them set and get crispy golden on the bottom side. Once crispy and golden, flip the potatoes to cook the other side, and add some salt and pepper. This process can take 15-20 minutes. Just be patient, it’s worth it.
    3. To serve: put hashbrowns on your plate and top with the onion jalapeno mixture.

    Smothered and Peppered Hashbrowns:

    5star.jpg

  • Coco-Cocoa Squares

    brownie.jpg

    This recipe comes from the Fiesta! A Celebration of Latin Hospitality cookbook. We’ve got an older edition, but this recipe is probably in the newer one too. This is a Brazilian style brownie, and they are excellent–ooey gooey and they tend to collapse in on themselves, but they are oh so yummy. You can easily substitute something else for the coconut (we’ve used mint andies candies that are excellent as well.)

    Ingredients:

    • 1/4 c. unsweetened cocoa powder
    • 4 TBSP unsalted butter, melted
    • 2 large eggs
    • 1 1/4 c. sugar
    • 1/2 c. vegetable oil
    • 1/3 c. plus 1 TBSP flour
    • 3/4 tsp. baking powder
    • pinch of salt
    • 1 1/4 c. grated coconut

    Directions:

    1. In a small bowl, stir together the cocoa and butter. In another bowl whisk the eggs and sugar until pale yellow and frothy. Stir in the cocoa mixture and the oil.
    2. In a bowl, sift together the flour, baking powder, and salt. Stir the dry ingredients into the egg mixture until thoroughly combined. Stir in the coconut.
    3. Preheat the oven to 350F.
    4. Pour the batter into a buttered 8 inch square baking pan. Bake in the middle of the oven until the top is crusty and browned, about 25 minutes.
    5. Remove from the oven and cool on a rack in the pan. Cut into 2 inch squares.

    Coco-Cocoa Squares:

    4star.jpg

  • Potato Chowder from Bogota

    columbian-potato-chowder.jpg

    The original recipe is in the Fiesta! A Celebration of Latin Hospitality cookbook, but we’ve changed a few things, so the recipe bellow is our adaptation. It’s really tasty and is great for a cold winter day. It’s also a great way to use up potatoes.

    Ingredients:

    • 4 boneless, skinless chicken breasts
    • 7 1/2 c. chicken stock
    • 3 pounds yukon gold potatoes (or whatever kind you like), divided: 2 pounds sliced thin and 1 pound cubed
    • 1 small onion, chopped
    • 2 garlic cloves, chopped
    • 1/2 c. diced red bell pepper
    • 1/4 c. chopped celery
    • 1 tsp. paprika
    • 1/2 tsp. cumin
    • 2 zucchinis, sliced into half moons
    • salt to taste
    • 1 c. frozen corn
    • 1/3 c. heavy cream
    • 1 avocado, diced
    • Cilantro, chopped
    • 1-4 chipotles in adobo, minced

    Directions:

    1. In a large soup pot, combine the chicken and stock and bring to a simmer over medium-low, skimming off the foam that rises to the surface. Add the 2 pounds of sliced potatoes and simmer, covered, over low heat until the chicken is tender, about 20 minutes. Remove the chicken and cube. Continue cooking the potatoes until soft, about 10 minutes more.
    2. While the potatoes are cooking, combine the onion, garlic, bell pepper, celery, paprika, and cumin in a blender with 1 c. of the broth from the soup pot, and puree until smooth.
    3. Add the puree mixture to the pot, along with the cubed potatoes and zucchini. Add salt to taste. Cook the soup until the cubed potatoes are tender and the sliced potatoes have almost disintegrated, about 20 minutes more.
    4. Add 1 c. of frozen corn and cook for another few minutes; then stir in the cream and the reserved chicken into the soup and simmer for 5 minutes.
    5. Ladle the soup into bowls and garnish with avocado, cilantro, and minced chipotles.

    Potato Chowder from Bogota:

    5star.jpg

  • Anne’s Garlic Soup

    annes-garlic-soup.jpg

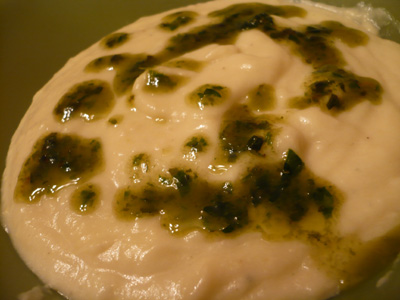
    This recipe is from Wolfgang Puck. It was good, but I don’t think we’ll have it again. It was really thick…like eating mashed potatoes, so if you make it, be sure to add more stock. Surprisingly the garlic flavor was not overwhelming; however, if you’ve ever eaten A LOT of garlic, you know what it does to your body–your sweat smells like garlic and lots of other things that I won’t mention on a food blog! If you’re brave enough to try this soup, do yourself a favor and buy the garlic already peeled. It took me 40 minutes to peel all the garlic for this recipe!

    Ingredients:

    • 2 c. (about 3/4 lb) peeled garlic
    • 1 large baking potato, peeled and cut into 1 inch cubes
    • 2 c. chicken stock
    • salt and pepper
    • 3/4 c. heavy cream

    Basil Oil:

    • 1/4 c. fresh basil leaves
    • 1/4 c. Italian parsley
    • 1 c. olive oil

    Directions:

    1. Blanch the garlic: In a medium saucepan, combine the garlic and water to cover. Bring to a boil, lower the heat, and simmer for 5 minutes. Drain and return the garlic to the pan. (Blanching the garlic will soften and also decrease the strong taste of the garlic.) Add the potatoes and chicken stock and season lightly with salt and pepper. Bring to a boil, lower the heat, and simmer until the potatoes are tender, about 20 minutes.
    2. Pour in the cream and just bring to a boil.
    3. Meanwhile, prepare the basil oil: In a blender, puree the basil, parsley, and the olive oil until smooth. Strain and reserve (I skipped the straining part). Clean the blender.
    4. Pour the garlic soup into the blender (it may have to be done in two batches) and puree until smooth. Scrape into a clean saucepan and reheat over a low flame. Correct seasoning to taste.
    5. Ladle soup into bowl and drizzle with basil oil.

    Anne’s Garlic Soup:

    3star.jpg

  • Creamy Fire Roasted Tomato Sauce

    creamy-fire-roasted-tomato-sauce.jpg

    We had some mascarpone cheese in the refrigerator that needed to get used up. I bought it with the intention of making tiramisu, but that never happened, so I started looking for some savory recipes to use the cheese in. I came across a couple of recipes that ultimately led to this amazingly flavorful recipe, created by yours truly. The Muir Glen fire roasted tomatoes are excellent and really do have a roasted flavor, and this rustic sauce was a crowd pleaser by young and not so young! We served this sauce over homemade spinach pasta, and the entire meal was excellent!

    Ingredients:

    • Olive oil
    • 4 garlic cloves, minced
    • 4 14 oz. cans of diced Muir Glen Fire Roasted Tomatoes
    • 1 9 oz. container of mascarpone cheese (start with half the container and add more if you want it creamier)
    • Salt and Pepper to taste
    • Basil, chiffonade

    Directions:

    1. Heat oil over medium high heat. Add garlic and saute for just a couple of minutes.
    2. Add the 4 cans of tomatoes, juice and all, and use a potato masher to mash some of the tomatoes. Bring the sauce to a boil and simmer uncovered for 20-30 minutes. The longer the simmer, the thicker the sauce gets, but if you don’t have the time, it will still be delicious. Adjust seasoning with salt and pepper (I didn’t have to, but that will be based in your tastes and the tomatoes you use.)
      Remove sauce from heat, and stir in 1/2 of the mascarpone, and combine to melt. Taste, and if you want the sauce creamier, add more cheese.
    3. Mix 1/2 of the basil into the sauce.
    4. Serve sauce over pasta of your choice and sprinkle with the remaining basil.

    Creamy Fire Roasted Tomato Sauce:

    5star.jpg

  • Challah

    challah.jpg

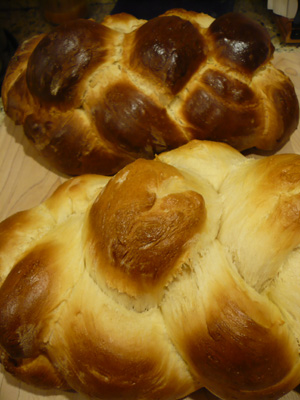
    This was my very first attempt at making Challah, and if I do say so myself, it turned out fantastic! I got this recipe from Meredith Jacobs’ book. The only thing I found to be a bit different in this recipe, is that it has you dissolve 3 packages of yeast in only 1/4 c. of water. The yeast never really bubbled, because the mixture was so thick…about the consistency of cake batter. My dough didn’t rise that much, but she says that if that happens, make it anyway, because it still tastes great. She didn’t lie, and while the loaves baked (the recipe yields 2 loaves) they rose quite a bit. We had one with dinner on Friday night, and then I froze the other baked loaf for another Friday night. You can use leftovers to make Challah French Toast…yummy!

    Ingredients:

    • 3/4 c. sugar
    • 2 c. lukewarm water
    • 3/4 c. vegetable oil
    • 1 TBSP salt
    • 3 large eggs
    • 3 envelopes yeast (totaling 2 TBSP + 3/4 tsp. yeast)
    • 1/4 c. lukewarm water
    • 8-10 c. bread flour
    • egg for egg wash

    Directions:

    1. Combine sugar, 2 c. water, oil, and salt. In a separate bowl, beat the eggs. Then add the eggs to the sugar mixture.
    2. In a separate cup, mix the yeast in 1/4 c. water. Make sure the water is warm–not cold or hot. This allows the yeast to work properly–you’ll know it’s working of you see little bubbles on the surface. (No bubbles for me, but it still worked. Next time I’ll probably play around with the amount of water to dissolve the yeast.)
    3. Add the yeast to the sugar mixture.
    4. Add 4 or 5 cups of flour and mix well. Gradually add 4 or 5 more cups of flour. By judging the feel you will know how much more to add–if the mixture is sticky, add more flour; if it’s dry and stringy, add a little water. (The amount of flour you’ll need will vary every time, depending on things like the air temperature and humidity, so don’t worry about an exact amount of flour.)
    5. Dump your dough mixture onto a floured surface (it probably won’t all be combined, that’s ok, because neither was mine and it works out just fine). Knead your dough on a floured surface for 7 to 10 minutes…I only lasted 7 minutes. Add more flour to your surface as needed.
    6. Put some vegetable oil on a paper towel and wipe it around the inside of a large clean bowl. Put the dough in the oiled bowl, and flip the dough over so both sides get a little bit of oil on them. Then lay a piece of wax paper over the bowl and then place a dish towel on top of that. Let the dough rise for an hour, and it should double in size. (Mine didn’t, so don’t worry if yours doesn’t.)
    7. Punch down the dough to deflate it, and knead again for a few minutes to work out any excess air bubbles. Put the dough back into the bowl, and cover with wax paper and towel, and let rise for another half hour.
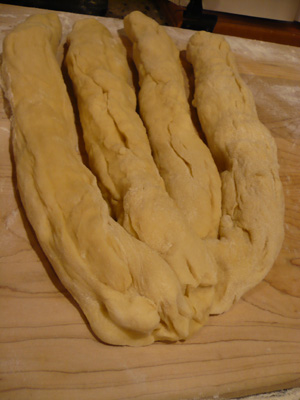
    8. Now you’re ready to braid. Take the dough out of the bowl and divide it into 2; then divide each of the chunks of dough into 4. Work with one set at a time. Roll the four pieces into snakes about 10 to 12 inches long. The length doesn’t matter, just make sure all 4 are the same length.
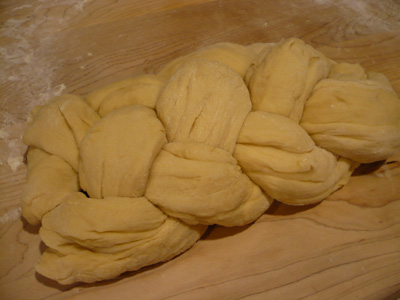
    9. Lay the 4 snakes on your work surface and pinch the ends together. Take the piece on the left and weave it over the roll of dough next to it, then under the next roll, and finally over the last roll, so that it finishes on the far right. Next take the piece that is now on the far left, and again, weave over, under, and over until it finishes on the far right. Continue to weave the left-hand piece until the pieces are too short to weave. Then pinch the ends together and tuck them under the loaf. Repeat with dough of second loaf.
    10. Step by step:

    challah-1.jpg

    Step 1: 4 equal snakes

    challah-2.jpg

    Step 2: Pinch ends together

    challah-3.jpg

    Step 3: Take far left snake and weave over, under then over the snakes to the right

    challah-4.jpg

    Step 4: Take the new far left snake and weave over, under and over the snakes to the right. Repeat.

    challah-5.jpg

    Step 5: Finished braided Challah and pinch the other ends together and tuck under the loaf

    10. Place loaves on a nonstick cookie sheet and place a dishtowel over them and let rest for 10 minutes.

    11. Prepare egg wash–don’t dilute it with water! Brush the egg wash onto each loaf.

    12. Bake at 350 for 45 to 55 minutes. Mine was done at 40 minutes, so I’d start checking at 35.

    Challah:

    5star.jpg

  • Fish with Thai Coconut-Curry Sauce

    thai-coconut-curry-fish.jpg

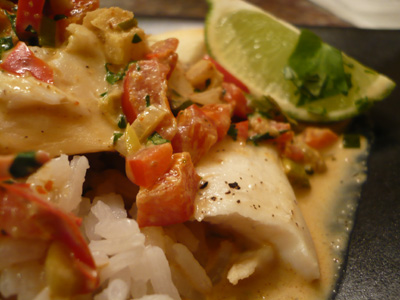
    We’ve made this recipe since it first was published is Cooking Light, September 2002. It’s one of our favorite recipes, and everyone we’ve ever made it for loves it too. It’s delicious and spicy, so if you’re not a spice fan, go easy on the curry paste. We love spicy food, and we put in a heaping teaspoon of the curry paste, although I do add in more fresh ginger than the original recipe calls for. The original recipe calls for using Tilapia, which is good, but we often use Salmon, and that’s really good. Some might argue that the sauce is too strong for such a flavorful fish as Salmon, but I love the texture and butteriness of the Salmon.

    The curry sauce is also an excellent curry sauce for chicken. Simply season chicken and veggies of choice (I use onion, eggplant, zucchini, and red pepper) with salt and pepper and stir fry (I stir fry each item separately and then remove from pan and keep warm while cooking the rest) in sesame oil, garlic, and ginger until done, then remove from pan. Make sauce using ingredients from curry powder through Thai basil; then squeeze some lime in and serve over rice. Delicious!

    I didn’t have any coconut milk on hand tonight, so instead I used 1/2 cream and 1/2 2% milk and it was delicious.

    The sauce comes together in no time at all, so you should have a game plan when you make this meal, and here’s mine:

    1. Preheat the oven
    2. Chop all ingredients for sauce
    3. Lay out all other ingredients for sauce
    4. Prepare fish
    5. Start rice
    6. Put fish in oven
    7. Make sauce

    Ingredients:

    • Dark sesame oil
    • 3 TBSP fresh ginger, minced
    • 2 garlic cloves, minced
    • 1 red bell pepper, finely chopped
    • 1 c. chopped green onions
    • 1 tsp. curry powder
    • 1-2 tsp. red curry paste or massaman curry paste
    • 1/2 tsp. ground cumin
    • 2 TBSP low-sodium soy sauce
    • 1 TBSP brown sugar
    • 1 (14-ounce) can light coconut milk
    • 2 TBSP chopped fresh cilantro
    • 2 TBSP of Thai basil (optional)
    • salt and pepper to taste
    • 4 (6-ounce) tilapia or salmon fillets
    • Hot cooked rice
    • Lime wedges

    Directions:

    1. Preheat oven to 350.
    2. Heat sesame oil in a large nonstick skillet over medium heat. Add ginger and garlic; cook 1 minute. Add pepper and onions; cook 1 minute. Stir in curry powder, curry paste, and cumin; cook 1 minute. Add soy sauce, sugar, and coconut milk; bring to a simmer (do not boil). Remove from heat; stir in cilantro.
    3. Put enough foil on a baking sheet to wrap your fish. Place fish on foil, and drizzle with sesame oil, and squeeze 1/2 of a lime onto fish. Sprinkle fish with salt and pepper. Wrap fish in foil, sealing the edges. Bake until fish flakes. Depending on the thickness of your fish it can take anywhere from 12 minutes to 18 minutes for the thicker pieces. The nice thing about steaming fish is that you can’t really over cook it. Alternatively you can broil the fish.
    4. Serve fish with sauce, rice, and lime wedges.

    Fish with Thai Coconut-Curry Sauce:

    5star.jpg

  • Polenta with Tomatoes and Mozzarella Salad

    polenta-with-tomatoes-and-mozzerella.jpg

    I wanted something a bit different, easy, and tasty. We had some refrigerated polenta that needed to get used, so I came up with this tomato mozzarella salad to top the polenta. It turned out great, and makes a great lunch or light dinner–especially in the summer when fresh basil is bountiful.  I didn’t have fresh basil on hand, but I did have rosemary and the rosemary was a tasty substitute.
    Ingredients:

    • Olive oil
    • Tube of refrigerated polenta, sliced into 1/2 inch rounds
    • 1 1/2 c. grape tomatoes, halved
    • 1 tsp. fresh rosemary, chopped or fresh basil, chopped (I would use more than 1 tsp. of basil, but I LOVE basil)
    • 1/2 tsp. dried Italian seasoning
    • salt to taste
    • pepper to taste
    • 3/4 c. mozzarella cheese, cubed

    Directions:

    1. Heat some olive oil over medium high heat in a nonstick skillet. Cook polenta slices until polenta is lightly browned.
    2. Meanwhile combine tomatoes, rosemary or basil, Italian seasoning, salt and pepper to taste, olive oil to taste (I probably used 2 tsp.) and cheese. Toss to coat.
    3. When polenta is done, remove from pan and place on paper towels to absorb any grease.
    4. Place polenta on your plate and top with Tomato Mozzarella Salad.

    Polenta with Tomato Mozzarella Salad:

    4star.jpg